Friday, May 27, 2011

Compositing (part 1)

Finally, just before the quarter is over, we got to the post-production stage for a few shots.
Garrett lead the compositing team and here's the images from him.
NUKE is used for compositing.


Shot 4: Slap comp


Z-Depth pass


DoF (Depth of Field)


VolRays


Comment from Garrett:
Today we finally had a chance to get some of the preliminary compositing work done. The top image is an early slap comp.

A Z-depth pass was output and used to generate a crude matte for some foreground elements to layer the volume rays behind the frogs. The Z-depth pass was also used to generate some DoF (Depth of Field) and some atmosphere in the distance.

3-D Environment Assests (part4)

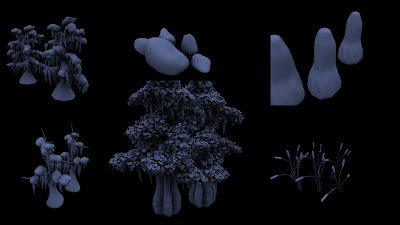
Ambient Occlusion for assets

Comment from Ting:
Above are examples of the ambient occlusion testing stage. During the process each object needs to reset transformation first, and then baked out brick map and point cloud files. Afterward, use the customized shader “uberplastic” to test if the ambient occlusion is working properly.


Grass
Comment from Steven:
Grass was a fun task to take on. I picked this task up from a fellow classmate and gave it the final touches. There was a good deal of experimentation with it. Although I wish Maya would allow me to create color ramps along the length of the grass blade, I did manage to create color variation on the base and tip color through color driven noise. This gave the grass a bit more depth than just two colors.

We decided to go with individual nurb patches of grass which could then be assembled throughout each scene. This made placement more interactive and mobile. Originally we were going with the fur attributes method but that ended up being too much trial and error to get the right settings in certain areas.


RIB archive issue and solution

Comment from Travis:
This last milestone has been a difficult process of vetting textures and shaders before they can be pushed out to all of the shots. Unfortunately that means doing the same task many times. After running into several issues with the RIB archives for the trees, it became apparently that I had made a grave mistake in changing the scale before exporting. In doing so, I corrupted the bounding box data for the ribs, causes errors in all of the scenes that use them.

Luckily because the ribs were created procedurally, they could be manipulated procedurally. I whipped up a bit of code that would resize the bounding boxes of the trees without changing the geometry in the scene. Using MEL it was a fairly straightforward task to iterate through the Trees RIB Archives because they were all named "R_PLANT_#".

This snipped of code goes through and expands the vertices (increases the size of the bounding box) and then scales down the geometry to its original size. This effectively just resizes the RIB archives trees to fit into our shots.


select -r "*:R_PLANT_*";
$GEOM = `ls -selection`;
$counter =0;
for($i in $GEOM)
{
if($counter % 2 == 0)
{
$count = `polyEvaluate -v $i`;
select($i + ".vtx [0:" + ($count[0] - 1) + "]");
scale -r 10 10 10;
move -r 0 1000 0;
select $i;
scale -r .1 .1 .1;
move -r 0 -100 0;
}
$counter++;
}


Lighting - 1st pass

Majority of the class worked on lighting in Maya using LINUX.
They used a "Light rig" (made by professor Wissler) to start with, and through last few classes, they finalized the "Look" for the lighting.

To work/render efficiently, trees & water simulation from Houdini were brought in as RIB archive, cattail were brought in as Geometry and RIB archive, and grasses were created with Maya Fur.
Although this method is time efficient when render and popular in real productions, a minor problem was that the imported RIB archive appears as a box, not the actual tree or water.
Hence, it was challenging for many of our lighters to get used to at first.


Lighting by: Ross

Shot 2: Frame 0178

Shot 2: Frame 0218

Shot 2: Frame 0302


Shot 3


Shot 53

Comment from Ross:
These are the first renders from our first lighting passes for several of the interior swamp shots. Lighting, shading and layout are still being dialed in at this stage and will be revised and updated as new assets are created/modified.


Lighting by: Steven
Shot 35: 1st pass
Comment from Steven:
Shot 35 was the first scene to actually have rendered grass included. The touch was nice but there needed to be further adjustments. The lighting is just first pass but it's well on its way. I am tasked to tweak the lighting in the next milestone to include more ambient light and have warmer direct light.

3D Character Painting (part 2)

Ivan


Boppit

Comment from Jack:
Aside from continuing my work on Shot 21, much of my effort was focused on smoothing the bumps on the frogs and retexturing most of the characters.

The layers of the bump map files used previously were blurred and further blurred at least five times before they are able to give an impression of smooth topography. Because the way the characters are UVed, most of the paint works have to extend beyond its boundaries in the color maps for them to show up without “seams.”

Watre Simulation - Simulations (part2)

More water simulations in progress...


Shot 12: 2nd pass


Shot 16: 1st pass
Fond out the log was animated instead of the camera...it's back to animators to fix now. (^_^;)


Shot 26: 2nd pass


Shot 26: 3rd pass


Shot 31: 1st pass


Shot 42: 2nd pass


Comment from Yuriya:
Above are water simulations I’ve been working.
Main difficulty I experienced was to balance the displacement amount when the air-boat and characters are in the same shot. In such case, the boat requires a larger displacement width, but the characters require much smaller displacement width. Hence, it’s been challenging to find a figure that will fit to both, but some could be hidden depending on the camera angle.

Again, the scale issue (extremely large & not constant scale) and very quick animation made it harder to predict the good figures. Also, multiple shots were re-animated, therefore, I had to re-sim some, but the animation was improved a lot in those re-animated shots, and was worth the time.

The RIB archives exported from Houdini are between about 4GB to 20GB depending on the shot, which are very large. Because of the size, we were unable to share it in the DropBox, but we now got a FTP site where we could upload these large size RIB archives as well as all the files we use. This was very helpful to hand the RIB archives to the lighting team.

========= Update =========

For the final week of the quarter, I've worked on some more 1st passes of water sims and handed the 3rd pass for shot 26 for lighting. The spray still needs some work. More particles should appear when the fish hit the water surface. The reason that there are fewer particles for the fish is because I was balancing with the spray from the air-boat. As we are simming with one POP-network for all the spray, it's sometimes difficult to find the happy medium.

However, I've just heard from professor that the spray for the air-boat may be removed for aesthetic point of view. If we are shifting to this, then it'll make the spray control much easier.

Other than the water simulations, I've worked on some more with the Blog. I've been updating the entire Spring 2011 crew Blog posts this quarter, and I believe I've organized them quite well. This was actually the first blog ever for me to work with. Since I like organizing, I enjoyed being Blog admin this quarter and learned new HTML/CSS codes to customize it. For this milestone 5 update, as well as the updates from our crew, I've organized post from previous crews. Now all the posts from each crew are in its own pages, enjoy!!

Wednesday, May 18, 2011

The crews of Spring 2011

The crews working hard on Friday, May 13, 2011.

From LEFT: Ting, Steven, Jack, Garrett, prof. Wissler, Travis

Our Priority Shot List status...work, work, work!!

Paul, a freelancer from previous crews, working on animation.

Ting, working on environment.

3-D Environment Assests (part3)

Further development in the environments.
Now they are shaded and lit.

The following environment was done by Ross.

Shot 2: version 01


Shot 2: version 02

Shot 2: version 01

Shot 2: version 02


Shot 2: with dappled light (video)


Shot 2: with dappled light (still)

Comment from Ross:
These images represent the first and second pass at lighting and revisions to the overall shot composition and layout. Shading and texturing are also being adjusted and revised to fit the lighting of the scenes. More revisions will follow as we continue to update the visuals and assets.


The below environment layout was done by Steven.
Shot 26

Watre Simulation - Simulations (part1)

The simulating stage for water. The simulations were done by Charles, Garrett, and Yuriya.

Comment from Garrett:
Shot 35 appeared to be a straight forward solve for the water simulation. But again scene scaling being so large and inconsistent posed some problems. When and where the scene scales got so out of whack still perplexes me. I wonder how many hands this has passed through and did no one realize that this is not the best way to work. I mean how are you supposed to compose shots if you are not even sure which frog is the largest... but I digress.

So as for water simming the fact that these shots are so large has made me an artist for guess work. Numbers for the water simulation have gotten pretty large, larger then you might expect.

But after having simulated about 10 shots now, I was able to get a solution that I think works pretty well. I’m looking forward to seeing this shot Light and Textured.


Scale issues


Solution


Comment from Yuriya:
During this milestone 3 period, I've worked on water simulation for shot 18, 17 and 42.
For these effect shots, I've imported the FBX files, which I've been exporting from Maya files with animation, to Houdini.
After importing the FBX files to Houdini, I've simulated water scenes with ripples and splashes using the water simulation template by Charles Trippe. The renders shown below is the 2nd pass of shot 17,this is exported as RIB and is handed to lighting team.
And in general, what I need to improve for other simulation shots are to create more defined ripple from the air-boat and less splashes (particle) to be visible as this type of air-boat doesn't create much splash in real.

Through this task, the difficulty I, and all the fx team faced was the scale of the Maya scene.
As all the scales of character and environment are so huge, the time spent for simulation increase significantly since we had to simulate a very large plane for water ripple, and a large number of particles. Especially for shot 18, as it is a long shot with over 200frames, a first ripple simulation took over 5hrs. This limited times of our test simulation in given time. Also the cache file size for simulation got large, that each fx shots caches were at least 2GB (nearly 10GB for shot 18).

As well as the water simulation task, I've been continuing to export Maya files to FBX files, as some shots were updated or added to work in Houdini.


Shot 17 - 2nd pass (under water view)

Water Simulation - First Set-up/Development

To achieve the 3-D water, the effects team decided to use Maya and Houdini for appropriate shots.
Maya - for short, non-complex water shot.
Houdini - for longer, more complex water shot (with ripples and sprays)

First, the work-flow of exporting and importing file between Maya and Houdini was established and documented by Garrett.
1) Export necessary models from Maya file as FBX.
2) Import to Houdini as filmbox FBX, work the water simulation.
3) Export the water simulation done in Houdini as RIB.
4) Import to Maya as RIB, now it's ready for lighting.

After the selection of water effect shots was made, most of the file conversion to FBX from Maya (step 1) was done by Yuriya. And she tracked the shots that were missing or in need for update through the quarter.

Once the FBX was ready to be imported to Houdini, Charles, made a template file in Houdini for water simulation. The water effect team then used the template to complete the water simulation.

Comment from Charles:
During Milestone 2, I developed a water simulation template for Houdini. I also took some time to revise it and added some features during Milestone 3. The idea of having a water simulation template is that we can have a single file already set up with all the bells and whistles Houdini uses to make particle and ripple simulation possible.
With this file, we can just drop in animated alter values which pertain to the simulation that I placed in a single node in the root that links up to values found within the node network and easily come up with simulations that would take much longer to set up on a per-shot basis. This simulation template performs a ripple simulation on a deforming plane surface, as well as generates a blobby mesh based on particles which provides water kick-up.

Screenshots of the template file's parameter in Houini

1) Simulate ripples


2) Adjust the ripple mesh


3) Particle spray simulation


4) Adjust particle mesh.


5) Export the ripple & spray simulation as RIB


Results (by Charles)

TESTS

TEST 01


TEST 02


Shot 53

3-D Envrionment Assets (part2)

Various development in environment assets.


Comment from Ross:
For our second Milestone, I was primarily tasked with creating environment assets and using those assets to layout and stage our first shots. I modeled a stylized tree to fit in line with the approved look and feel for the environment. That model was then used to stage the layout for the opening sequence as the camera follows a slow decent into the swamp below.


Comment from Travis:
The task at hand is populating the environment into all of the shots. We've been utilizing our procedural scene generation script to quickly and efficiently place our scene geometry.
The script allows the environment artists to paint in different types of vegetation with different color channels. It also utilizes RenderMan's Level of Detail (LOD) to expedite the rendering process.

LOD test

After that we used background cards for distant trees, clouds, and sky. So far we've finished the environments for about 25 shots, now they can move on to final shading and lighting.


Further development for tree and rock was done by Travis as well. (shown below)
Tree


Rock

3-D Environment Assest (part1)

Grass tests

Ting worked in developments for 3-D grass, bushes and trees.
He worked on making maps for the grass and rendering the grass, developing the “look”. Also, modeled and textured some generic blobby spheres, meant to represent bushes. Finally, he modeled a few environmental assets, like cattails and grass.


Grass test 01

Comment from Ting:
“Baldness map” works with fur grass. The result has showed that baldness map can be applied to fur grass in order to create a transition from the intensive area to the bald part according to the alpha map.

Grass test 02


Bush tests
Bushes 01 - This bush focuses on the variation of green.

Bushes 02 – This bush has more orange and yellow.


Bushes 03 – This bush has some mix of magenta and red.


Cattails Tests

Cattails 01 - Re-build Nurbs model from the poly one, which Greg, a freelancer from the previous crews, built in the earlier stage.


Cattails 02 - Another version of cattails. This version has longer and thinner stems.

Cattails 03 - Another version of cattails. This version has thicker stems at the lower part. The leaves only begin from the middle part, giving a flower-like look.


Tree tests
Tree 01 - Re-build Nurbs from the poly one, which Greg, a freelancer from the previous crews, built in the earlier stage.


Tree 02 - Another version of tree. This version has more short branches on the trunk.